Adding OpenCV 4.5.3 to Visual Studio 2019

Hi everyone,

I know there is google and I know there is a search function here in the forum but I can’t get it to work - either the tutorials are written for an older opencv version or for an older visual studio version or both…

I keep getting the LNK2019 error and I’m lost…

I followed the Adding OpenCV 4.2.0 to Visual Studio 2019 project in Windows using pre-built binaries tutorial first but without success.
I understand what the error message is trying to tell me but I have no more ideas how to solve it…

maybe someone here can point out what needs to be done different compare to the mentioned tutorial above…

Kind Regards
Tobi

generate an empty VS solution using the cmake recipe.

then look at what’s set in that thing.

if you want help, you have to provide facts (logs). you haven’t given any. if you aren’t going to bother, expect little response.

Hi,

youre right - my fault:

that’s my little demo project:

Error Log:

Fehler	LNK2019	
Verweis auf nicht aufgelöstes externes Symbol 
""bool __cdecl cv::imwrite(class std::basic_string<char,struct std::char_traits<char>,class std::allocator<char> > const &,class cv::debug_build_guard::_InputArray const &,class std::vector<int,class std::allocator<int> > const &)" (?imwrite@cv@@YA_NAEBV?$basic_string@DU?$char_traits@D@std@@V?$allocator@D@2@@std@@AEBV_InputArray@debug_build_guard@1@AEBV?$vector@HV?$allocator@H@std@@@3@@Z)" in Funktion "main".	opencv-test	C:\Users\blattner\source\repos\opencv-test\opencv-test\opencv-test.obj	 

Fehler	LNK2019	
Verweis auf nicht aufgelöstes externes Symbol 
""void __cdecl cv::imshow(class std::basic_string<char,struct std::char_traits<char>,class std::allocator<char> > const &,class cv::debug_build_guard::_InputArray const &)" (?imshow@cv@@YAXAEBV?$basic_string@DU?$char_traits@D@std@@V?$allocator@D@2@@std@@AEBV_InputArray@debug_build_guard@1@@Z)" in Funktion "main".	opencv-test	C:\Users\blattner\source\repos\opencv-test\opencv-test\opencv-test.obj	 

Fehler	LNK1120	
2 nicht aufgelöste Externe	opencv-test	C:\Users\blattner\source\repos\opencv-test\x64\Debug\opencv-test.exe

VC++ Directories tab:


Linker tab:

Environment variable:

DON’T link both d and non-d libraries at the same time.

do you even have a world library, or do you have module libraries?

have you logged out and back in again after editing the PATH variable?

and I repeat: just generate the VS solution with cmake. don’t mess around with this stuff manually before you know what the settings should be.

oh, and VS 2019 is vc16, not 15. check that this is all correct.

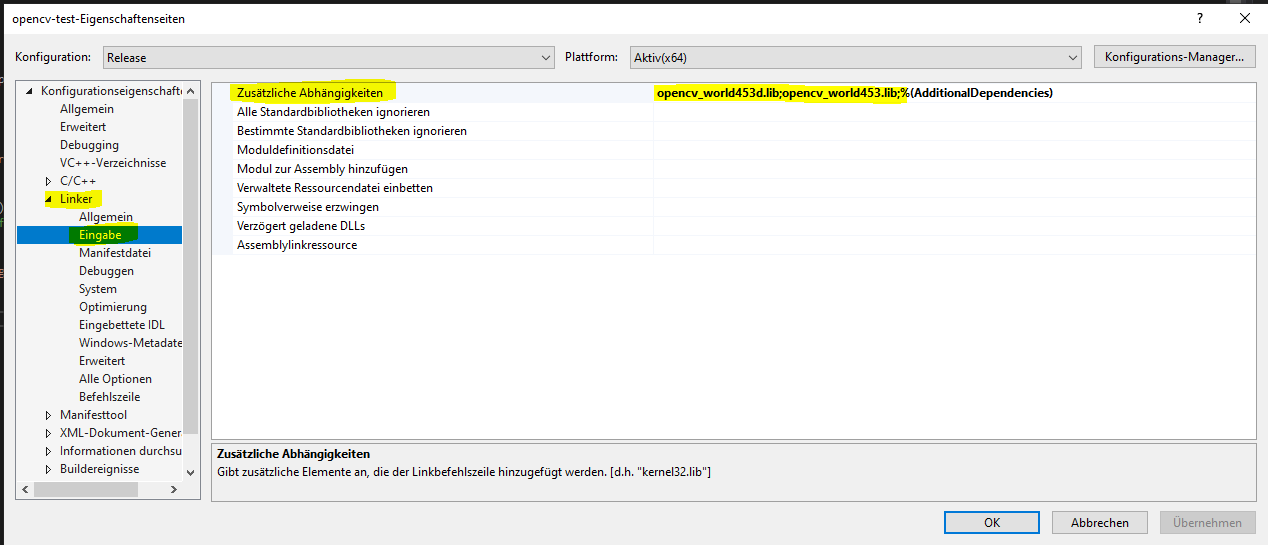
Yes linking both d and non -d was an act of frustration → I fixed that

Yes I restarted the machine after editing the PATH variable.

What got me confused it in the tutorial it looks like three options to install:

  1. Installation by Using the Pre-built Libraries

  2. Installation by Using git-bash and cmake

  3. Installation by Making Your Own Libraries from the Source Files

I went for 1) because it looked straight forward and simple and was matching the tutorial I linked in my first post.

But anyhow, I followed your recommendation and followed the "Installation by Using git-bash and cmake tutorial…

But instead of step 8 of the tutorial: “Drink a coffee or two…” I called it a day.

New day new happiness - at this point the tutorial isn’t really much help anymore because it’s referring to another version. But I thought I figured it out - fixed the file paths because they slightly changed…

and… it works :star_struck: thank’s to @crackwitz

1 Like